Amazon EC2 (Elastic Compute Cloud) is a highly scalable, available and flexible cloud computing service offered by Amazon Web Services (AWS). It is amongst mostly used and widely known AWS offerings. It enables businesses and cloud engineers to easily provision and manage virtual servers in the cloud. There are various use cases for EC2 and here we are looking for how to Host A Website On AWS EC2.
In this blog, we are going to set up a web server on an AWS EC2 instance to host a website and it will be available immediately.
Get Set Go !!!
AWS Console Login
Login to your AWS console from any web browser using the root account or the IAM user who is having required access for EC2 service. As per AWS best practices use the IAM user account with privileged access.
Login Link: https://aws.amazon.com/
Creating EC2 Instance
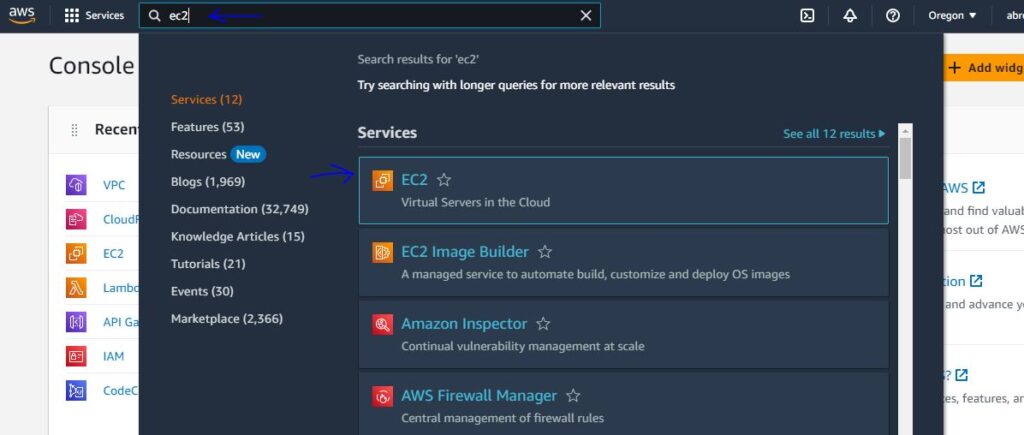
- After logging into the console search for the EC2 in a search bar and select the EC2 service name.
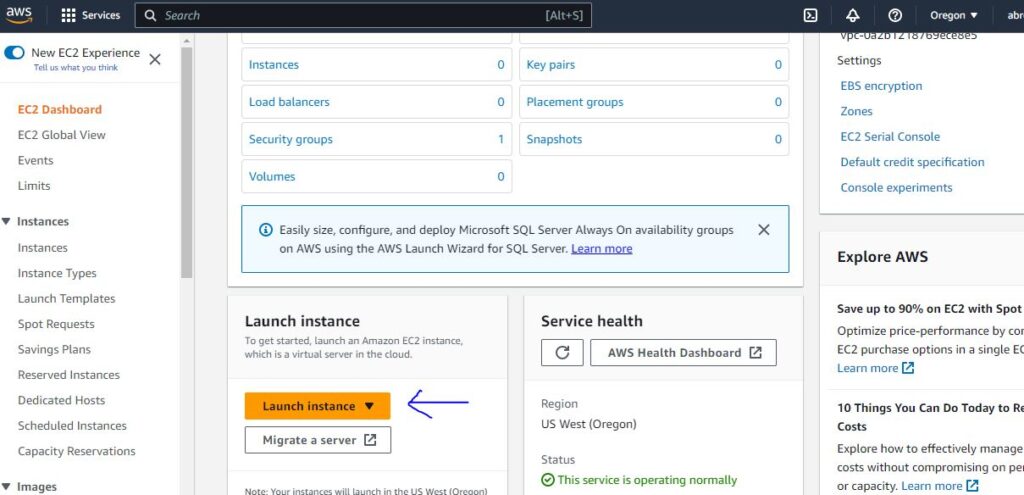
- On the EC2 console, click Launch Instance, and choose Launch Instance to begin creating your EC2 instance.
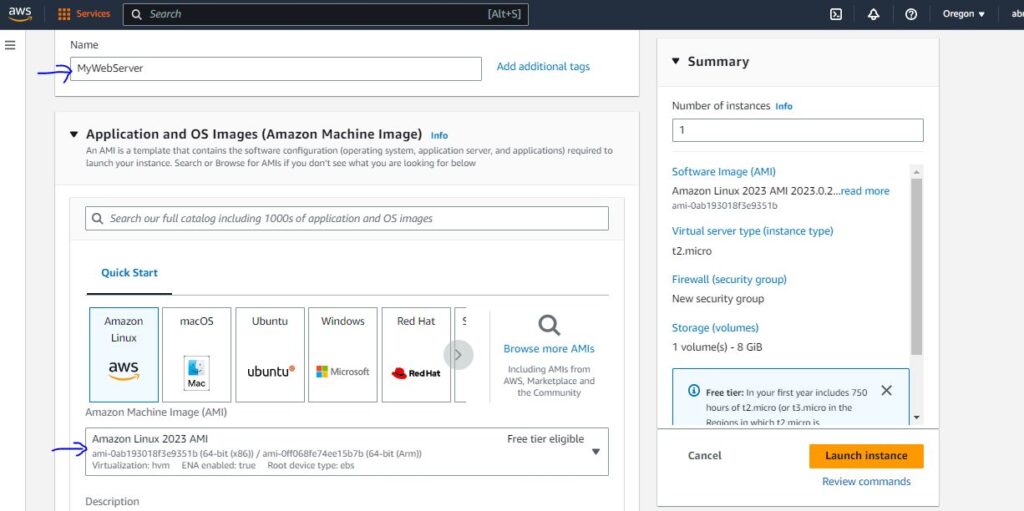
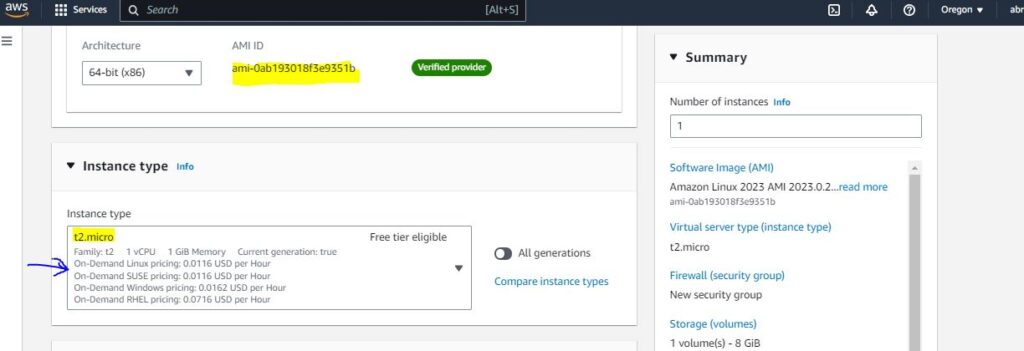
- Choose the desired name for instance and Select the Amazon Machine Image (AMI). You can choose any of them which are free tier eligible but I prefer to choose Amazon Linux AMI. Select the Architecture 64-bit (x-86). Please note the AMI ID is different for AWS regions.
- Scroll down a little bit and Select the Instance type as per the need for hosting website. For Free Tier please select the t2.micro option.
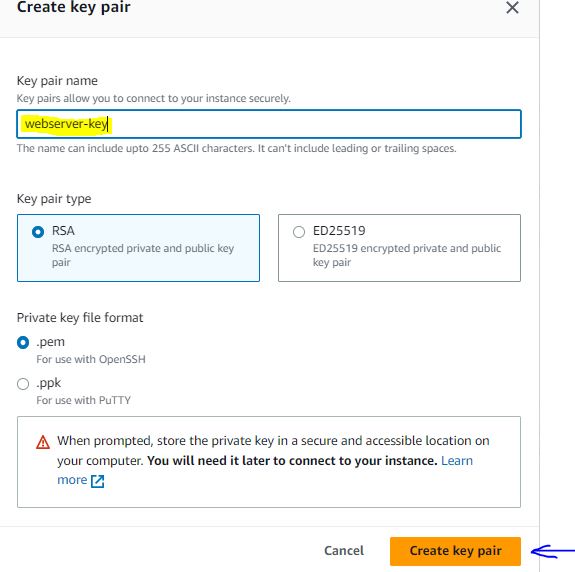
- Click on the create new key pair in case we want to create new pair. There is an option to choose existing key pair.

- Under the Network setting, Select the VPC ID in which we want to create an EC2 and Select Subnet. Keep the Auto-assign public IP enabled. It will provide us with the public IP to access our website over the internet.

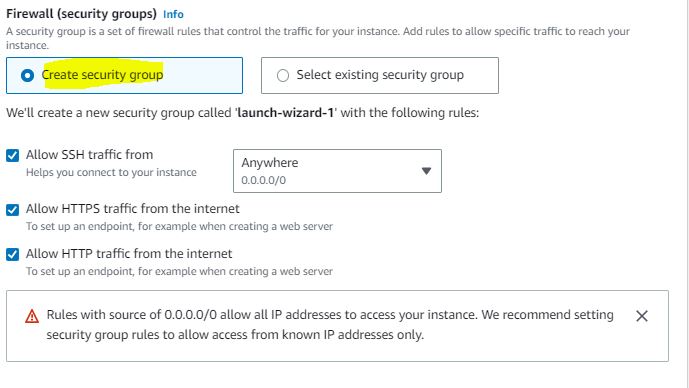
- For the security group, create a security group that allows SSH (port 22), http(port 80) and https(port 443) to allow the inbound connection. If we do not allow these ports then our website will not be accessible from the internet.
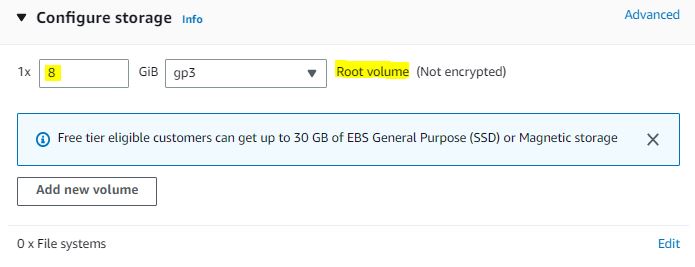
- Next, Configure Storage. Choose the Root volume size. We can also add the extra EBS volumes while creating the EC2.
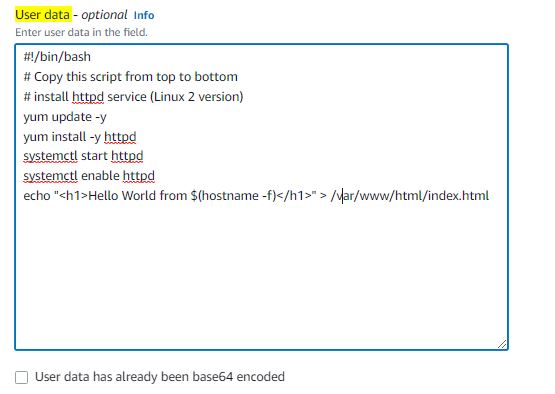
- Click on the advanced details tab and scroll down at the bottom. Copy the below line of code and paste it in User data section. This user data will install httpd webserver on the EC2 instance automatically and start the httpd service. We can also choose any other webserver like Ngnix in place of Apache httpd.
#!/bin/bash
# Copy this script from top to bottom
# install httpd service (Linux 2 version)
yum update -y
yum install -y httpd
systemctl start httpd
systemctl enable httpd
echo "<h1>Hello World from $(hostname -f)</h1>" > /var/www/html/index.html
Check the summary page and click on the Launch Instance button.
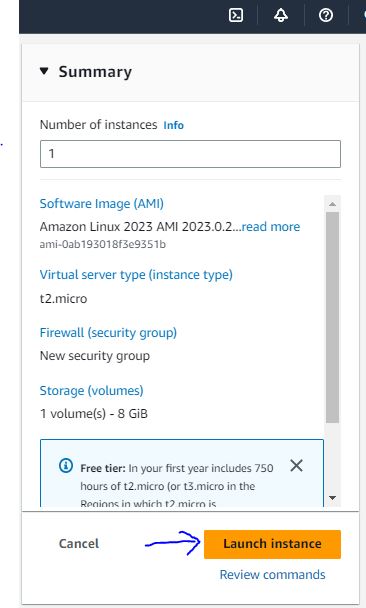
There will be a successful message of EC2 launch.

Check the Status of EC2
Go back to the EC2 main dashboard and Select the Instances tab. Name of the instance can be found on this page. Please wait till both the status checks get passed.

Host A Website On AWS EC2
Copy the public IP address of the EC2 and paste it in web-browser.
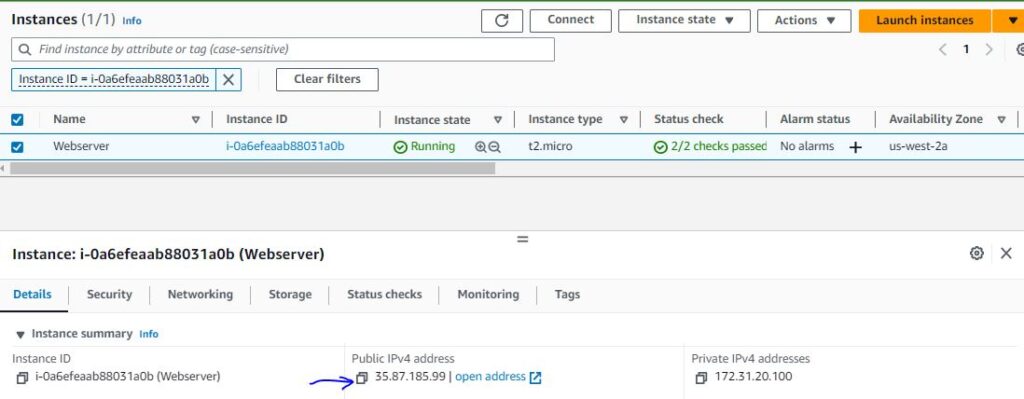
Now the EC2 is ready and we can try to check our website using the Public IP Address of the EC2.

Logging Into the EC2
We can login to EC2 in case of any issues, troubleshooting and modification of the webserver page.
For logging in, we can use either putty from Windows OS, command line from MacOS and Linux.
AWS has provided a new secure way to connect to our EC2 instance using the EC2 instance connect or Session manager which used the SSM agent in the backend. SSM agent are installed by default in Amazon Linux 2 image. For other OS, we need to install SSM agent and start the agent service. Also, we need to attach the IAM role which have required SSM IAM permissions.
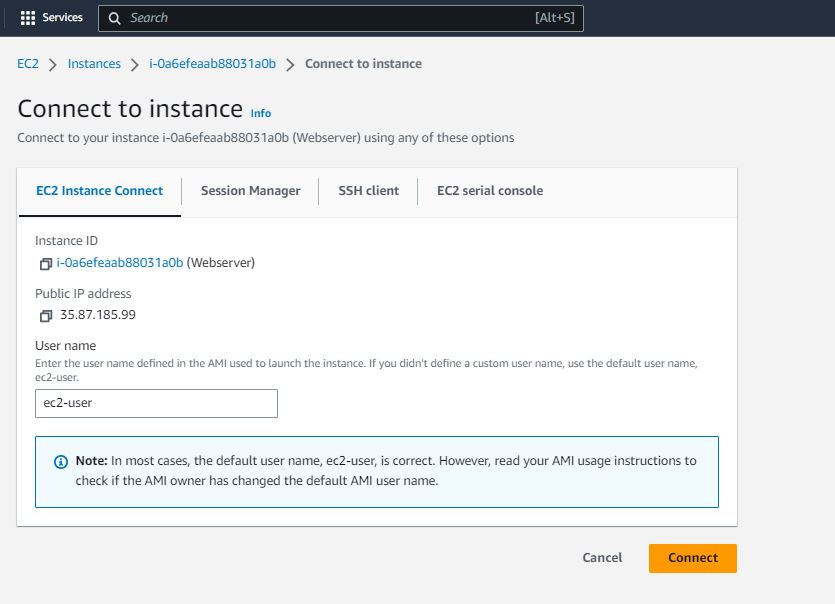
It will login into EC2 from the web browser.
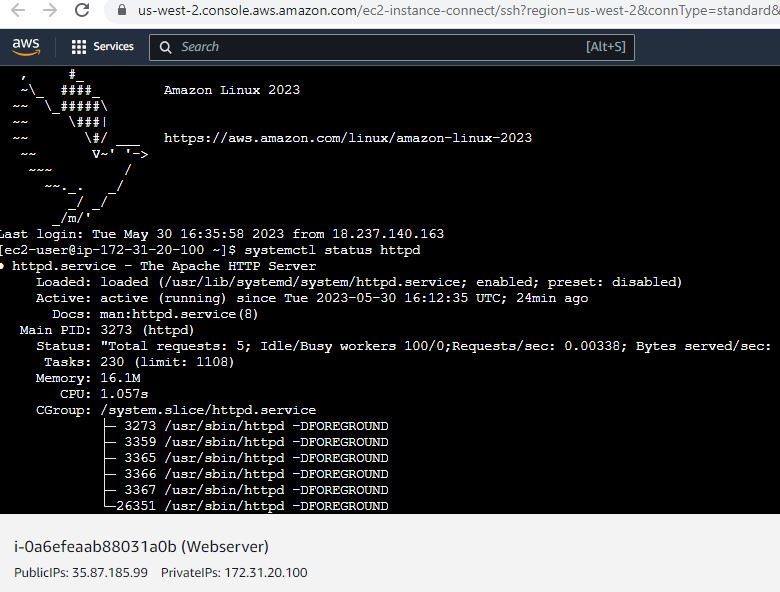
Please find the more information for SSM
We are going to use the Session Manager option to connect to our EC2.
Secure Website Configuration
We now understand how to access website using the Public IP address. But when we are building the website for Organization it should be more secure and it should be accessible using the domain name like google.com, amazon.com or trendingtechgurus.com.
To achieve this we can leverage AWS services to get the domain name and SSL certificate.
Route53: Amazon Route 53 is a highly available and scalable Domain Name System (DNS) web service. Route 53 connects user requests to internet applications running on AWS or on-premises. Route53 routes end users to website reliably with globally-dispersed Domain Name System (DNS) servers and automatic scaling.
AWS ACM: AWS Certificate Manager (ACM) provision, manage, and deploy public and private SSL/TLS certificates for use with AWS services and internal connected resources. ACM removes the time-consuming manual process of purchasing, uploading, and renewing SSL/TLS certificates.
Using the EC2, Route53, and ACM, we can create our fully cloud-based, secure website.
Conclusion
Website is the most essential part of any business. Here in this Blog, we cover how to create a website, how to access a website, and how to secure a website all using AWS cloud services.
Happy learning..
2 thoughts on “How to Host A Website On AWS EC2”