In today’s digital world, the demand for highly available websites is huge. Organizations work hard to ensure their online presence remains accessible and reliable for their users. AWS provides highly available, scalable, and durable options when it comes to AWS EC2 Website Hosting. You need to pay absolutely zero when you are under AWS tier usage. You can create a website that can be highly available and accessible from anywhere in the world. All this will cost zero or very little amount of money. Gets started to create and test your first highly available website.
Prerequisite
AWS account with root access or IAM user with required permissions
AWS EC2 instances preferably Amazon Linux1/2
AWS Application Load-Balancers (ALB)
SSH-Key pair
AWS Security Groups
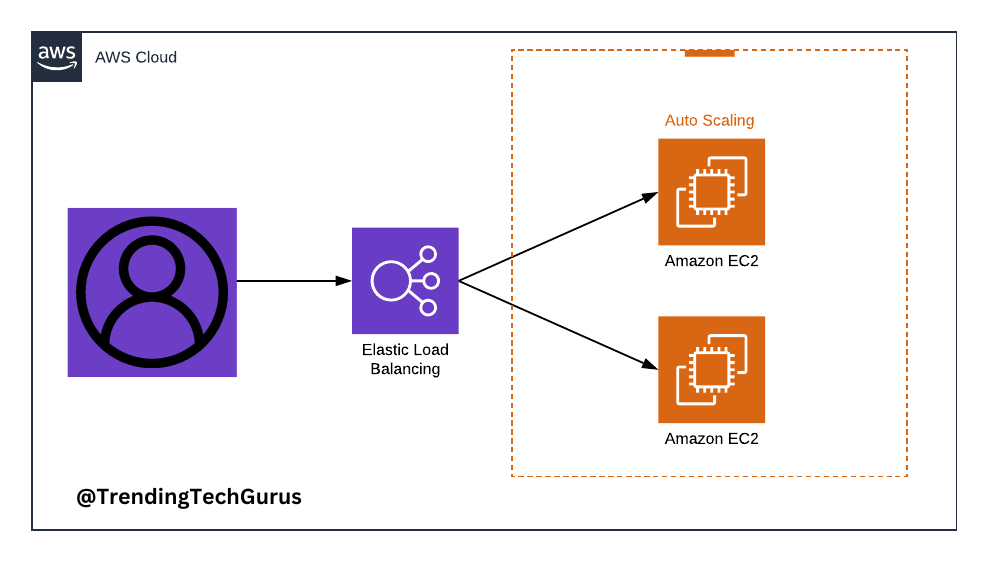
Steps to Create EC2
Before we start, you can check our Blog to get understand the step-by-step process of creating EC2 and how to access EC2.
Login to AWS console: https://aws.amazon.com/console/
Search for the AWS EC2 in a search bar
In AWS EC2 Dashboard, click on Launch Instance
Provide Name to the instance e.g. WebServer1
Select the latest Amazon Linux AMI which is showing Free Tier Eligible
Select Instance Type as t2.micro. Please Note: If you want to be in the free tier then please select t2.micro. Other instance types will cost you money. Please select the Instance Type as per your requirement.
Select the Key Pair. Please choose Create new key pair if you do not have any key pair in that region. Please keep in mind the key pair is region specific.
Under Network Settings, Choose a subnet that is specific to one Availability Zone e.g. us-east-1a. This is important because we want to set up our website as a Highly Available Website.
From the Security Group, choose ssh and http protocol and the Source Type should be My IP for ssh and Anywhere for http. This will open the ssh port (22) from your machine/laptop and HTTP port(80) from the internet.
Do not open port 22 for Anywhere. Attackers might try to log in and steal your information.
Configure the Storage. The default will be 8GB. We can add additional volume as per your requirement.
Select Advanced Details, scroll down toward the end of the page, and Choose User Data
This user data script will install httpd service, start the service and create your sample website page.
Copy the below user data script in that section
#!/bin/bash
# Copy this script from top to bottom
# install httpd service (Linux 2 version)
yum update -y
yum install -y httpd
systemctl start httpd
systemctl enable httpd
echo “<h1>Hello World from $(hostname -f)</h1>” > /var/www/html/index.html
Now check the summary and select Launch instance button.
We have successfully created one EC2 instance. But our aim is to create a highly available Website.
Create one more EC2 instance using the same above steps.
Here we need to do one change while creating the EC2. Select any other availability zone e.g. us-east-2b so that in case of any Availability zone failure our website still run from another EC2 which is created in a separate Availability zone.
Select key pair, VPC, Security group, Storage, and same user data script.
And finally launch the second EC2 instance.
Check both EC2 instance statuses in the EC2 dashboard and wait for them to be available.

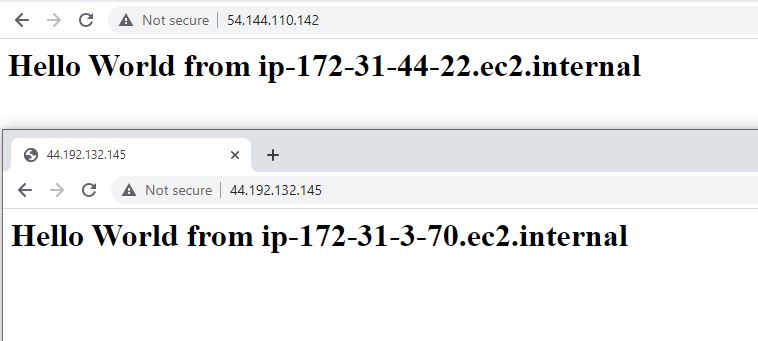
Check the Website using the individual IP address
Copy the Public IP address of each EC2 instance and paste it into the web browser.
Create an Application Load Balancer
Create a Target group:
Before we start creating the actual Application load balancer for your AWS EC2 Website Hosting, create target group in which you need to register your both EC2 instances.
Search for the EC2 in the AWS console, On the left navigation plane scroll down, and under the Load Balancing section, Select Target Groups
Click on Create Target Group.
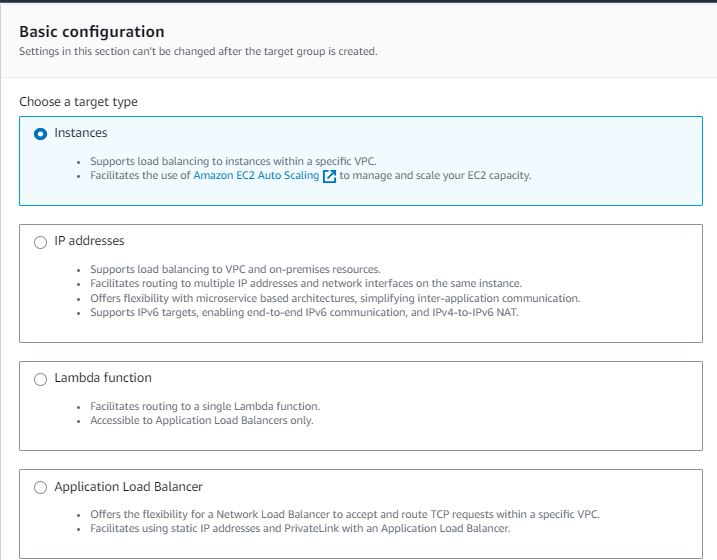
Choose a target type as Instances
Provide the Target group name as WebServerTG
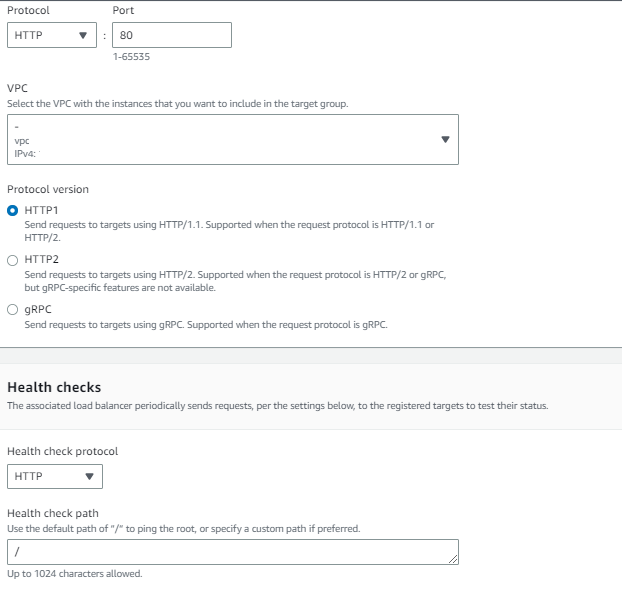
choose protocol as http port 80
the protocol version as HTTP1
Health Check protocol as HTTP
Health check path as /
Click on Next
Please find the below screenshot for your reference:
Click on the Include as pending below button

Finally, click on the Create target group.
Create Application Load Balancer:
Search for the EC2 in AWS console, On the left navigation plane scroll down, and under Load Balancing section, Select Load Balancers.
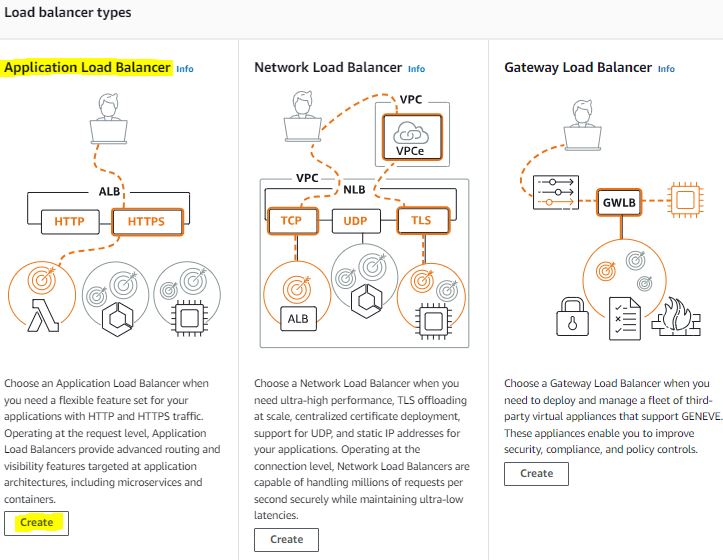
Click on Create Load Balancer and click create
Please choose the Application load balancer as it works on layer 7 of the OSI model. It serves the http and https traffic coming from the internet and distributes the traffic to the underlying EC2 instances.
Provide the name of to Load balancer name as WebserverALB
From Scheme, choose Internet Facing as this will be the public load balancer
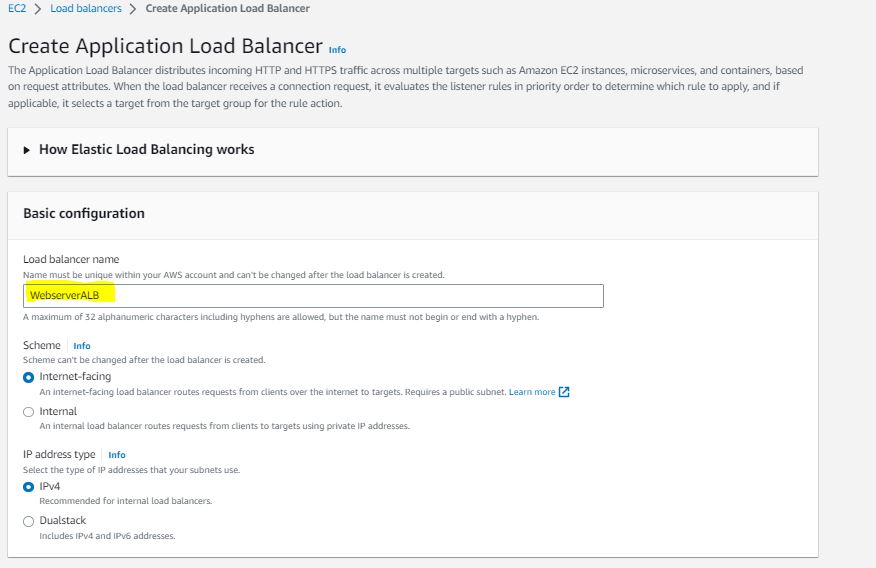
IP address type, IPV4
Choose VPC and Subnet. Make sure you are selecting the same subnets in which your EC2 instances are currently running. us-east-1a and us-east-1b
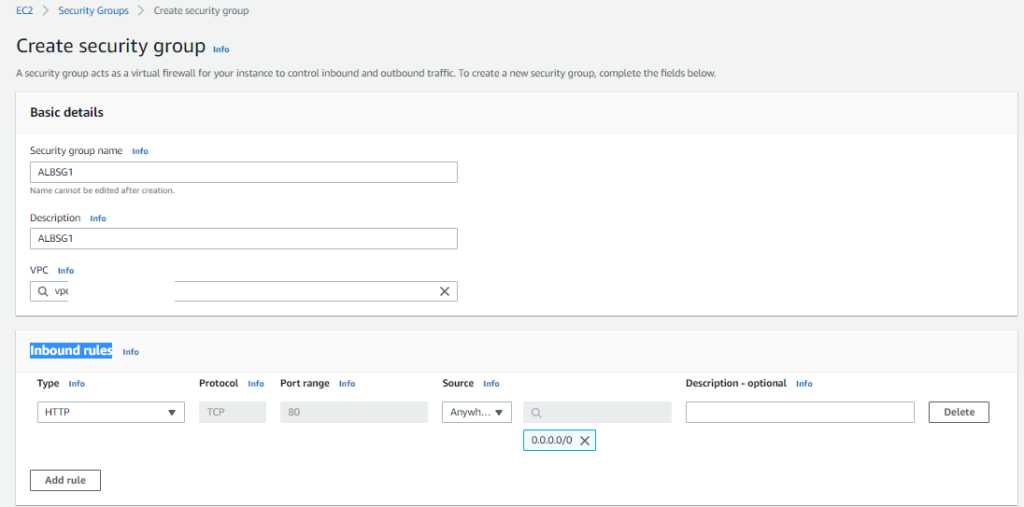
From Security Group, Click on Create a security group
Provide the name to the Security group as ALBSG1
Choose the same VPC in which load balancer and EC2 are created
Under inbound rules, choose http and it will be open from anywhere in the world
Outbound rule will open for all traffic.
Create Security group.
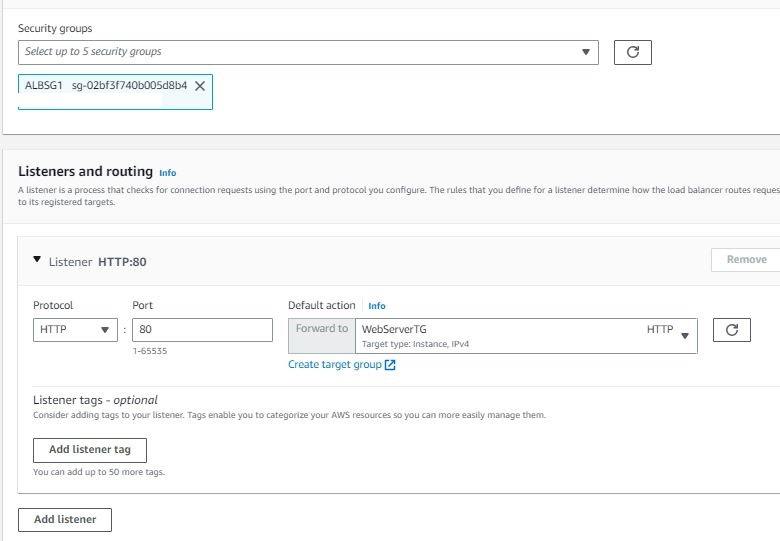
Now from the security group, choose the one which you just created i.e. ALBSG1
From Listeners and routing, choose Protocol HTTP, port 80, and forward to the Target group which we initially created i.e. WebServerTG
Check the summary and click on Create Load Balancer.
Load Balancer creation will take a few minutes. It will add and register EC2 instances mentioned in the Target Group after completing the Health Check
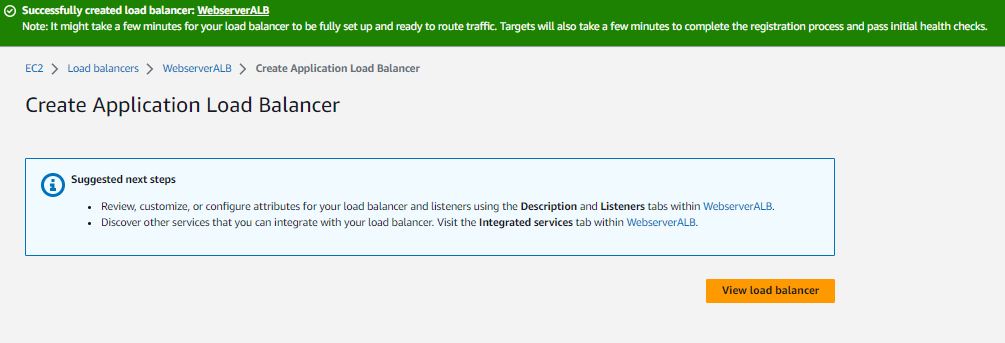
It’s time to check the load balancer. Check the status of it. It should be in active status.
Copy the DNS Name mentioned.
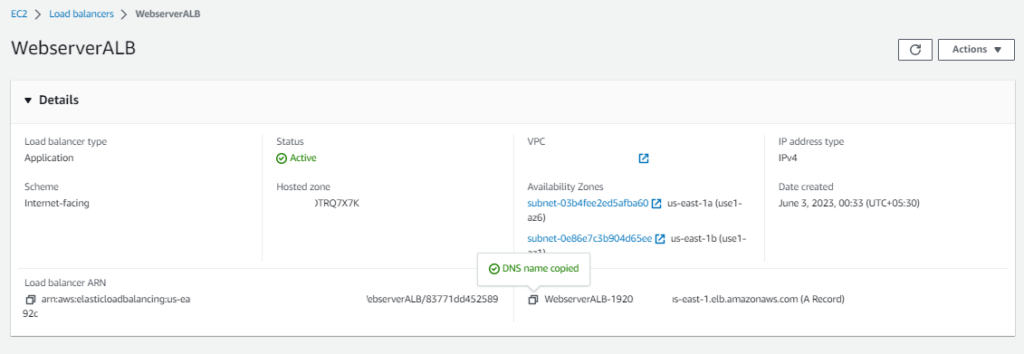
Copy and paste the DNS name into your Chrome browser and refresh the page.
You will notice your Website is being served from the Application Load Balancer and it is actually Highly available. It redirects the traffic equally on both EC2 instances.

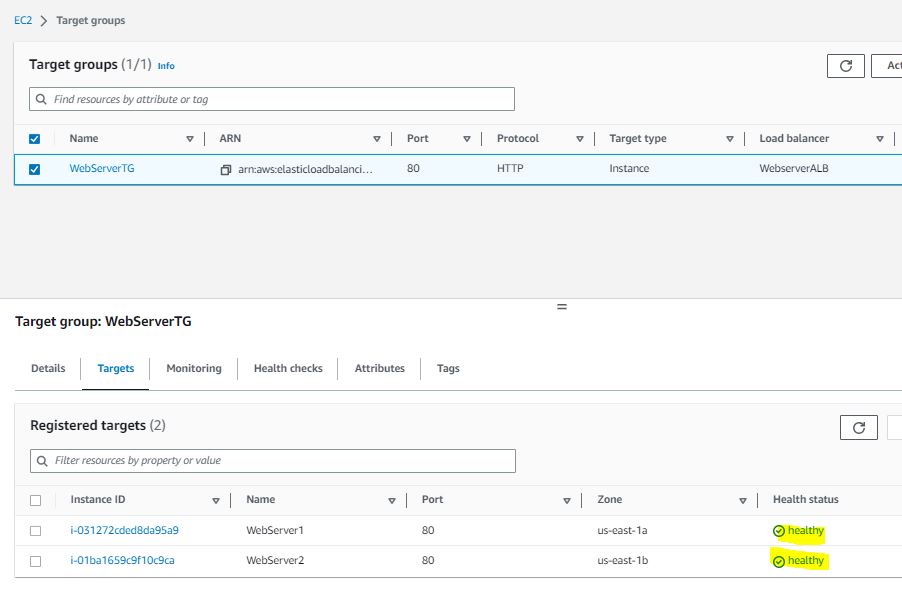
Both the EC2 instances are healthy and we can check that under the Target Group, Target section
Test Highly Available AWS EC2 Website Hosting
Now suppose you want to test the high availability situation where one AWS availability zone is down or one of your EC2 Webserver goes down.
To simulate this test, you can stop one of the EC2 instances and wait for a few minutes.
Application Load Balancer detects this behavior and routes all the traffic to a healthy EC2 instance.

Check the Load balancer URL now. It will route the traffic to WebServer1 EC2 instance only.
Hit refresh multiple times, it will only redirect to one EC2.
 This demonstrates the power of the Highly Available architecture provided by the AWS EC2 and Application load balancer.
Best Practices
Remove the port 22 access from extra IP ranges or from Anywhere. Just open up Port 22 ssh port only from your Laptop
Only allow port 80 of EC2 from Security Group of the Application Load Balancer. It will prevent direct HTTP traffic to EC2.
Use the AWS certificate Manager to generate SSL certificate and implement the SSL certificate on Application Load Balancer. It will allow https 443 connection which is more secure than http connection.
Get the domain name from Route53 and configure a good dns name for your website.
Try implementing the AWS Shield , and WAF on Application Load balancers which can help to protect against DDOS and malicious attacks on your website.
Conclusion
Hosting a highly available website using EC2 and an application load balancer empowers organizations to deliver a seamless and reliable online experience for their users. This will enhance website productivity without taking any undesirable downtime which means the website is always up and running, enabling the organization to focus on driving growth and success.
Hope this help you to understand how to use AWS EC2 Website Hosting. Keep Learning.